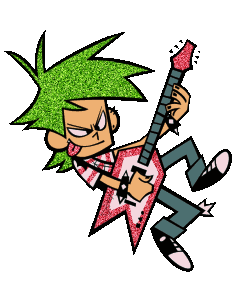
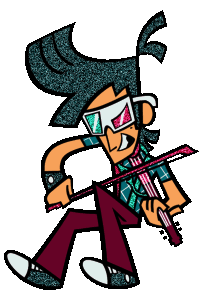
Does anyone remember those funny little graphics back in the day that would sparkle and shine? Those animated glitter graphics that you'd see on someone's Neopet or MySpace profile page? Graphics like this?
As a kid, I loved decorating my profiles with these and I've always wondered how people made these. As an adult...I still also wondered how people made them. There are various sites where you can edit your pics to add glitter effects to them, inclufing, but not limited to, these:
And these are great editing tools for those who want to do simple glitter editing! Except...my biggest issue was how fast it was flashing and the limited colors I could use. What if I wanted more control on how my glitters turn out, like different shades of teal, an exact shade of salmon that isn't on the editors, or a smooth color gradient?
I tried to look for tutorials, but I could hardly find anything and it seemed like everyone pointed to using the online tools to make glitter graphics. I ended up reverse engineering some old Neopet glitter graphics I have seen before that had a very different glitter pattern from the typical ones I'd see made with the online tools. I realized the glitter pattern is a noise filter.
To save everyone the trouble, I decided to write out a tutorial so that you also can make your own glitter graphic with your very own art program! This tutorial is a muxh needed update from my previous tutorial that I made many years ago.
What you will need:
- The image you want to glitterfy
- An image editing program that has filters (Clip Studio Paint, Procreate, GIMP, Photoshop/Photopea, etc.)
For the purpose of this tutorial, I am going to assume the image you want to glitterfy is your own art and that you already have it ready to edit. While any drawing of any size can have the glitter effect added to it, these are my personal reccomendations:
- The image is small, no more than 350px x 350px.
- The image is simple rendered and flat colored (with or without cel shading).
- The edges are hard and not anti-aliased (but this can be done because my older stuff is anti-aliased).
- The image is transparent and does not have a background.
- The image is flattened.
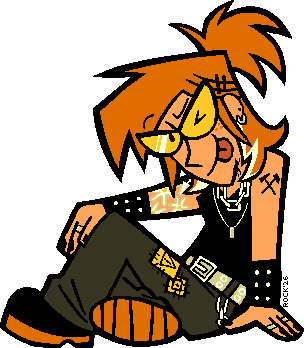
Before we continue, everyone say "hi" to Zinnia! She will be helping us with the tutorial today. You can see that this image of her fits all my recommendations above. By the way, I personally work with canvases up to 350px x 350px for my glitter images, but have done up to 1000px x 1000px in the past and they still turn out pretty alright. Still, the smaller the image is, the better the glitter effect will look! This file type is a .png.
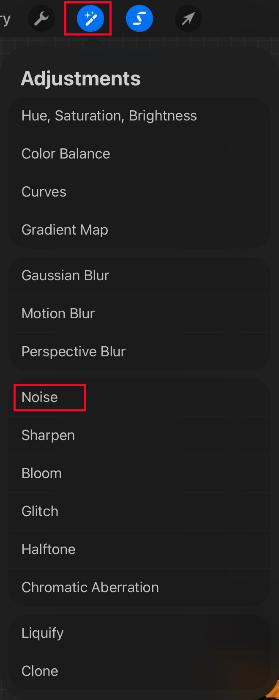
Adding glitter with the noise filter
For this part, you are going to need that handy image editing program. Just make sure there is an option to add a noise filter! This part may look different for different programs. Below, I have options for a few art programs I have on hand to show you how it can be done in each. I am hoping that the tools will be similar across programs.
Open your image in your program of choice, then duplicate your image three (3) times. One of the images is your original master copy, in the event something goes wrong with the duplicates or you want to start over because they turned out like shit.
Clip Studio Paint
While CSP is the main program I use to draw, I'm not a big fan of their noise filter pattern...and prefer to export my files as a .png to Procreate, but I will show how it is done here anyway if someone wants to use it. FYI, Version 1 of CSP (what I have on my computer) does not have the noise filter.
You must locate the magic wand tool. With the magic wand, you will need to select every section of the piece that you wish to add the glitter effect on. This is why a simple piece with no anti-alias works well. You can choose as little or as many spaces as you want. Hell, you can even select the entire image. I personally like to have parts of my image have glitter, usually jewelry, piercings, and small details on the character like stripes on a shirt or patches on a jacket. For Zinnia, I chose her accessories and anything that is white and yellow.

Your magic wand tool might be in a different location than mine.
With everything selected, I create a new layer on top and use the fill tool with a contrasting color to show where my selected areas are. This is helpful for if I accidentally delete the selection or want to add or remove an area and need to redo the noise. If you ever lose your selection, you can ctrl+left click your selection layer OR ctl+right click > selection from layer to select all the areas you wish to glittery again.
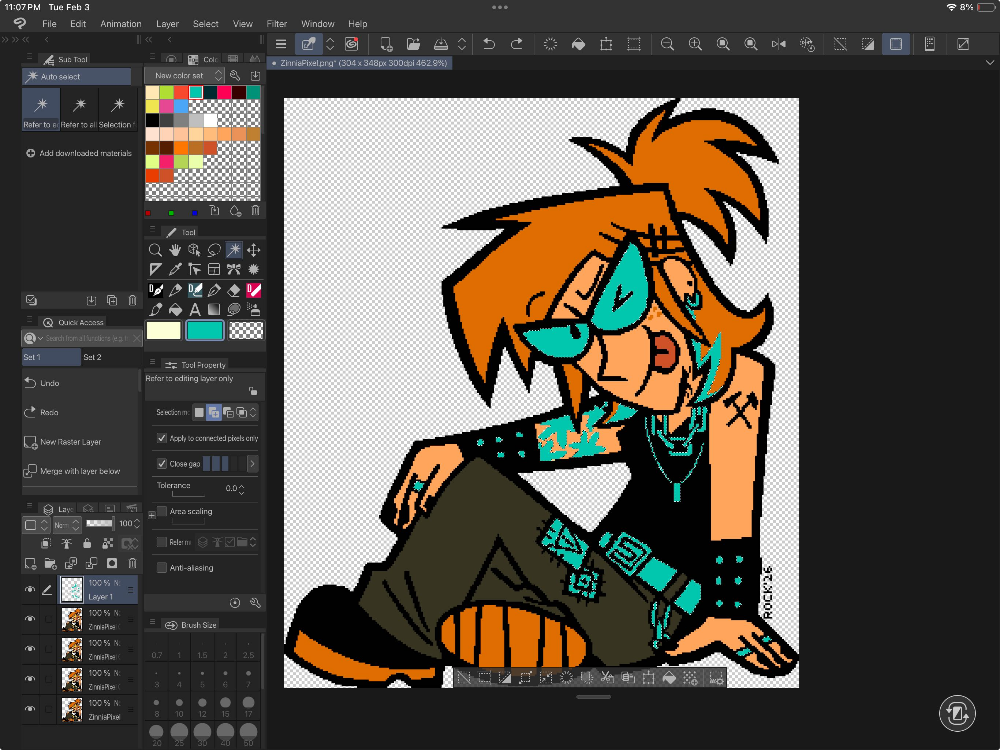
The blue nicely contrasts Zinnia's main colors so the selected areas can be seen.
Now that we have our selection, let's add the noise filter. On CSP, this is accessed by going to Filter > Effect > Noise.
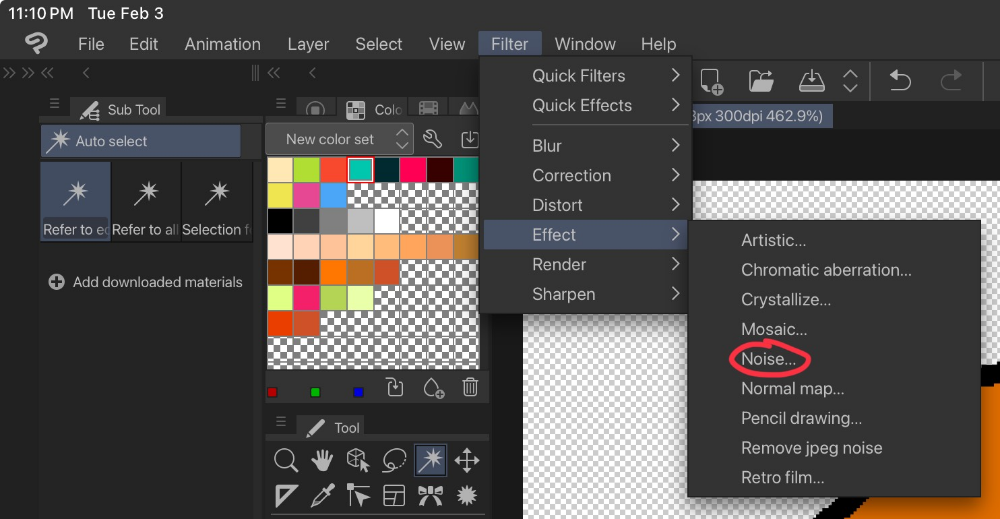
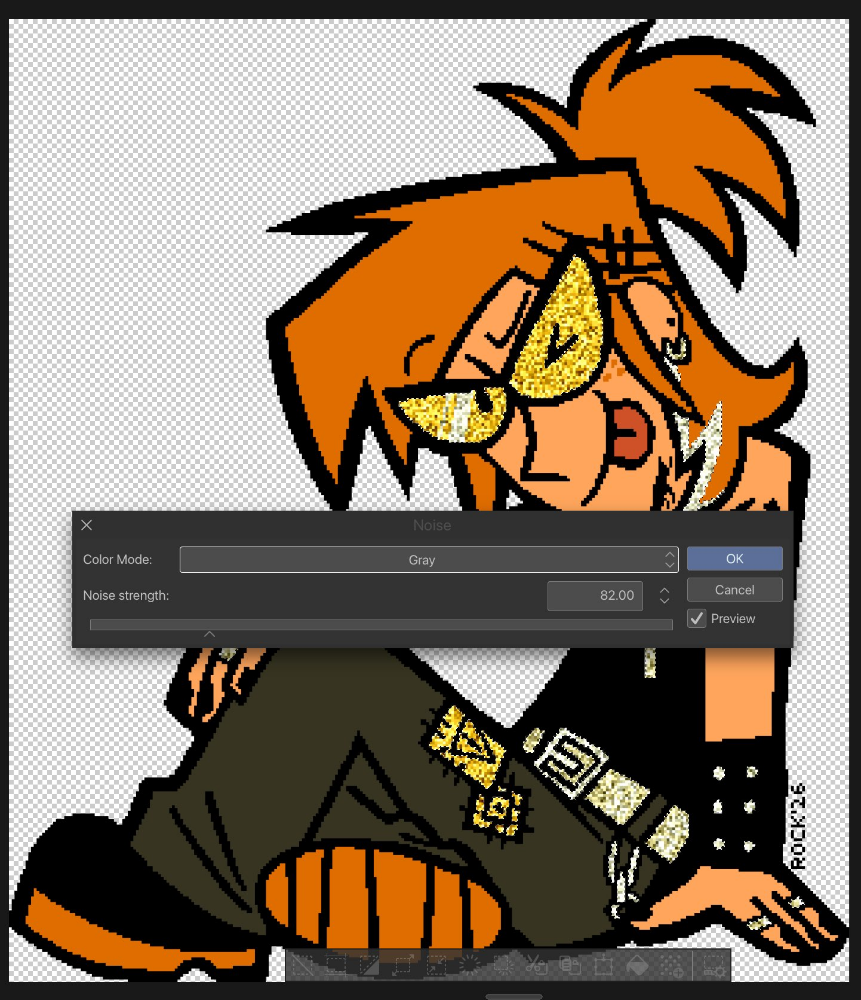
This window will pop up. Depending on what you want to achieve, your choice might be different from mine. Most glitter graphics are monochrome noise, so for my "Color Mode", I choose Gray. "Noise strength" is how much noise you want to add to your image - a low number means it is very light and a higher number makes the noise more heavier and prominent. You will need to play around with these numbers to see what fits for you.
Repeat this process for the 2 other layers, except change the noise strength to something bigger or smaller than the last. For me, I did 82, 83, and 84. The numbers don't need to be exact and and you can skip increments.
Procreate
I typically export my CSP projects as a .png file to Procreate to add the noise filter. Locate the selection tool and choose the automatic option. Because my image does not have anti-alias, I set the threshold down to the lowest it can possibly be (but a higher threshold is good if you want to select similar colors in the same area).


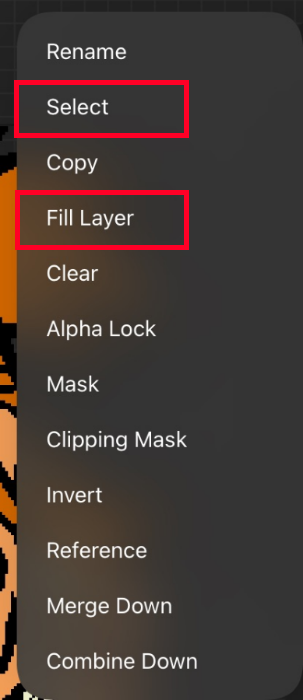
With everything selected, I create a new layer on top, hold down until the menu pops up, and choose Select and Fill Layer with a contrasting color to show where my selected areas are. This is helpful for if I accidentally delete the selection or want to add or remove an area and need to redo the noise. If you ever lose your selection, you can hold down the selection layer and choose selection to re-select all the areas you wish to glittery again.
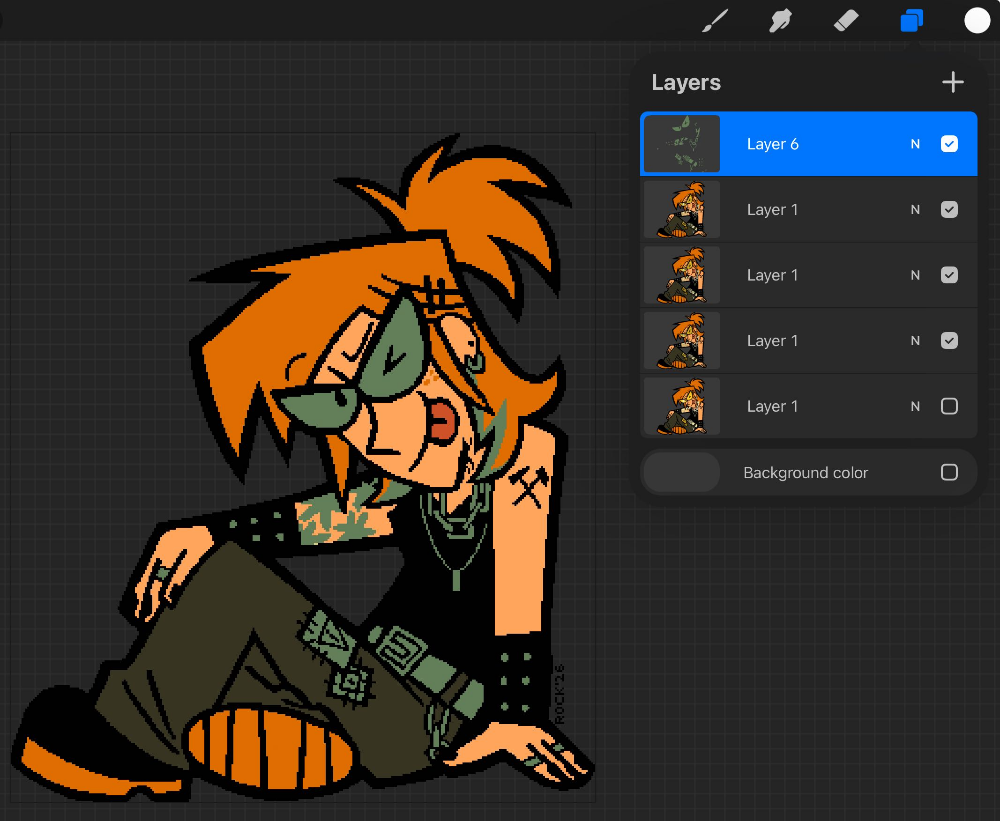
I'm kinda lazy tbh and usually just use the last color I have, but this blue-green still nicely contrasts Zinnia's main colors.
Now that we have our selection, let's add the noise filter. On Procreate, this is accessed by going to the "Adjustments" menu and going to "Noise".
Below are my usual settings for the noise pattern I like to use. For bigger images, the "scale" will need to be bigger.
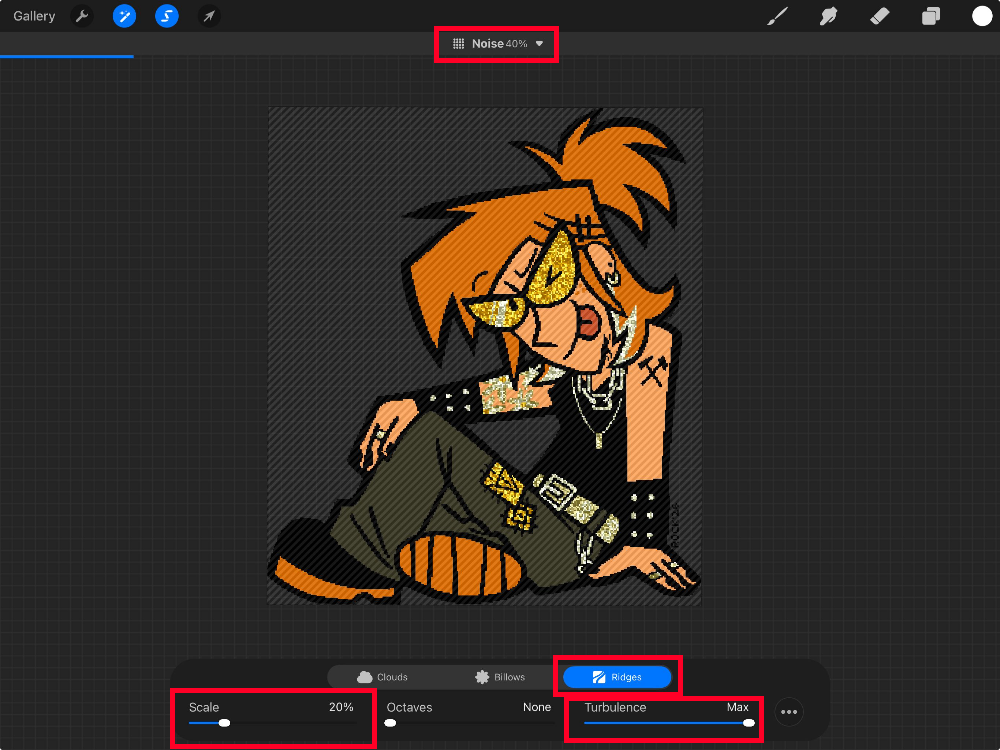
If you click on the three dots, you can change how you want the noise to look like. My settings have "Additive" toggled on and "Single" checked off.
Repeat this process for the 2 other layers, except change the scale to something bigger or smaller than the last. I typically choose 20% for my first layer, 23% for my middle layer, and 27% for my last layer for a piece that is no bigger than 350px.
Photopea/Photoshop
I don't really use Photoshop/Photopea, but it is honestly pretty good for glitter graphics especially if your piece has anti-alias. You can refer to the CSP tutorial because it's pretty similar and if you have a brain you can piece it together, but there is one tool I want to highlight: The Color Range selection. You can access it by going to Select > Color Range, where you will see this window:
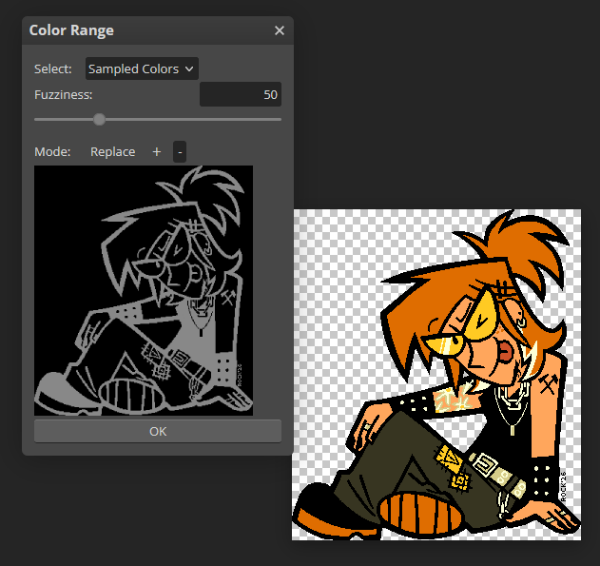
You will need to click on the "+" (plus) sign, then start selecting colors on the MAIN IMAGE (not the window) that you want to be glittered. If you choose the wrong color, you can click the "-" (minus) sign to remove that selection. For "Select", I use "Sampled colors" so it allows me to colordrop my main image, while for "Fuzziness", I put my settings at 2. For anti-alias images, you may need to make the "Fuzziness" a little higher. The window now displays where all your selected areas are:
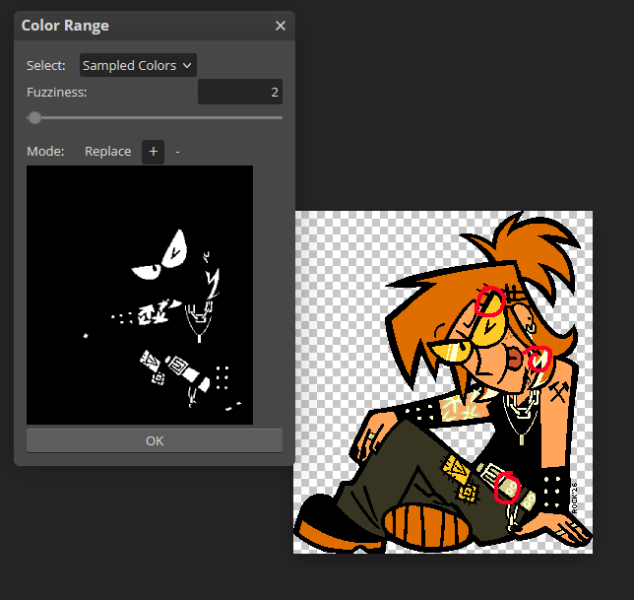
Parts I circled in red are where I sampled the color and as you can see, it grabs every part of the image that has that same color.
And because I am feeling generous, I'll at least give you my Noise settings for Photopea/Photoshop too:
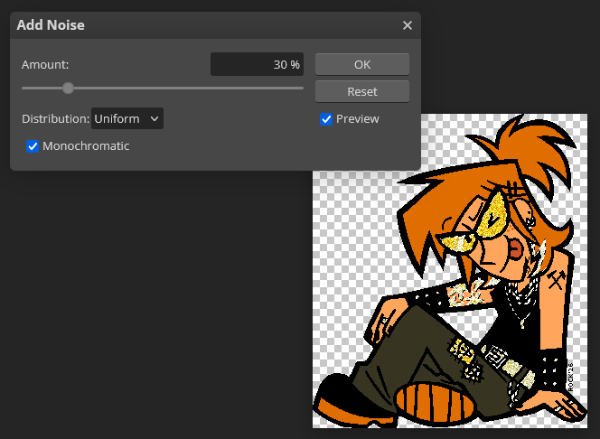
My "Amount" is typically in the 25% - 50% range depending on how dark I want the glitter. I set my "Distribution" to Uniform and check off Monochromatic. And repeat for the 2 other layers.
Optional: For fun, I also like to manually add a few bigger sparkles here and there with a larger pixel brush so the glitter sizes looks more irregular. I'll turn the selection on and stamp the brush in a few areas, then do it again for each layer.
Once the glitter has been added, we are ready to animate it!
Animating the glitter effects
Your program does not need to have a built-in frame-by-frame animation feature to do this part, but I will include both ways in this tutorial. FPS (how fast your image sparkles) is up to personal preference but I prefer to choose an FPS of between 5 to 9, usually at 9 fps. Anything faster than that makes my eyes bleed and beg for mercy. Consider accessibilty to be a factor in choosing how fast your image goes, if not for other's sake, then for your own at the very least because you are most likely going to be the person who sees that image the most.
Using frame-by-frame animation in your image editing program
I only do frame-by-frame aniamtion in Procreate. I hate animating with the timeline in CSP and PS!!! It's very clunky for me to use...so good luck if you want to use those. Maybe in the future I will update with how I animate in those programs but lately I've just chosen to not.
For Procreate, you'll need to go to Actions >Canvas > Animation Assist and toggle it on. A frame-by-frame timeline will then appear at the bottom of the screen.
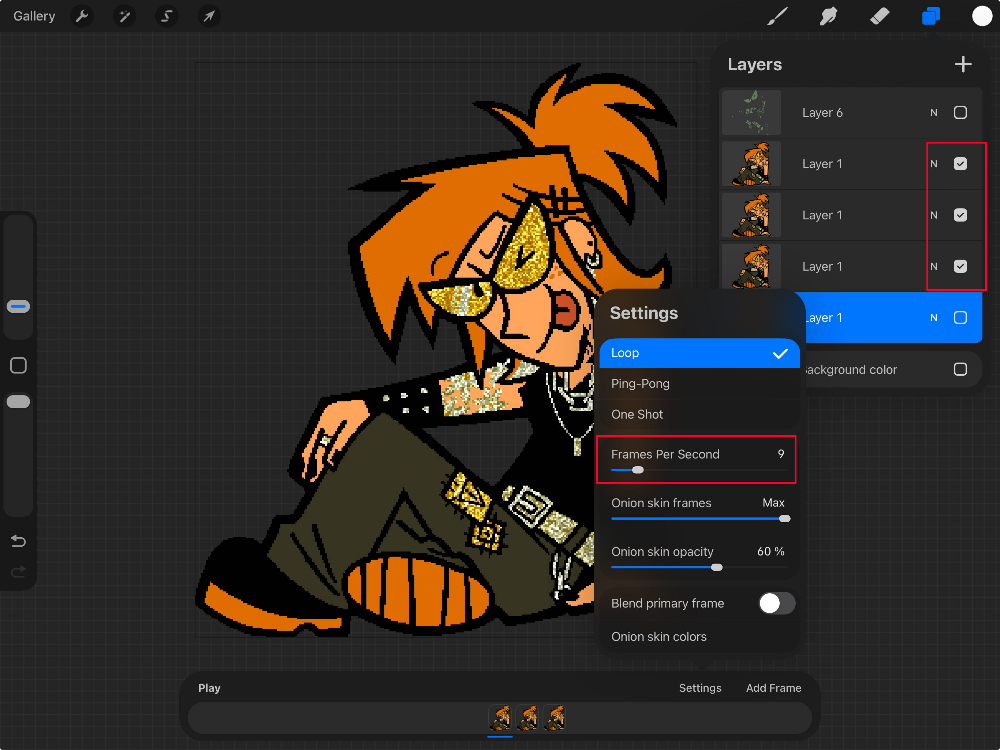
These are all my settings for the animation assist on Procreate. Any layer I don't want in the animation is hidden.
Once you're happy with your results, you can then export your GIF by going to Actions > Share > Share Layers > Animated GIF. This screen will pop up when you do:

I don't have any set recommendations for the export settings. They seem to differ on every GIF I've made as GIF files can only support up to 256 different colors and the glitter effect can overload it sometimes. You will just have to play with these settings and see which works best. And if none of the options work out for you, you might need to use EZgif to animate your graphic, so keep scrolling!
Using EZgif gif maker
EZgif is an online tool that can edit your images, including making gifs, resizing images, and optimizing images. It is great for putting together gifs and I like to use it when Procreate (my usual animating program) struggles to export my gif files correctly. It happens a lot more than you think, usually when it doesn't export the correct colors.
If you animate this way, you will need to save 3 separate .png files of your image, as each of them will be a frame. You can upload them all at once.
You may have your own preferences, but here are my own settings:
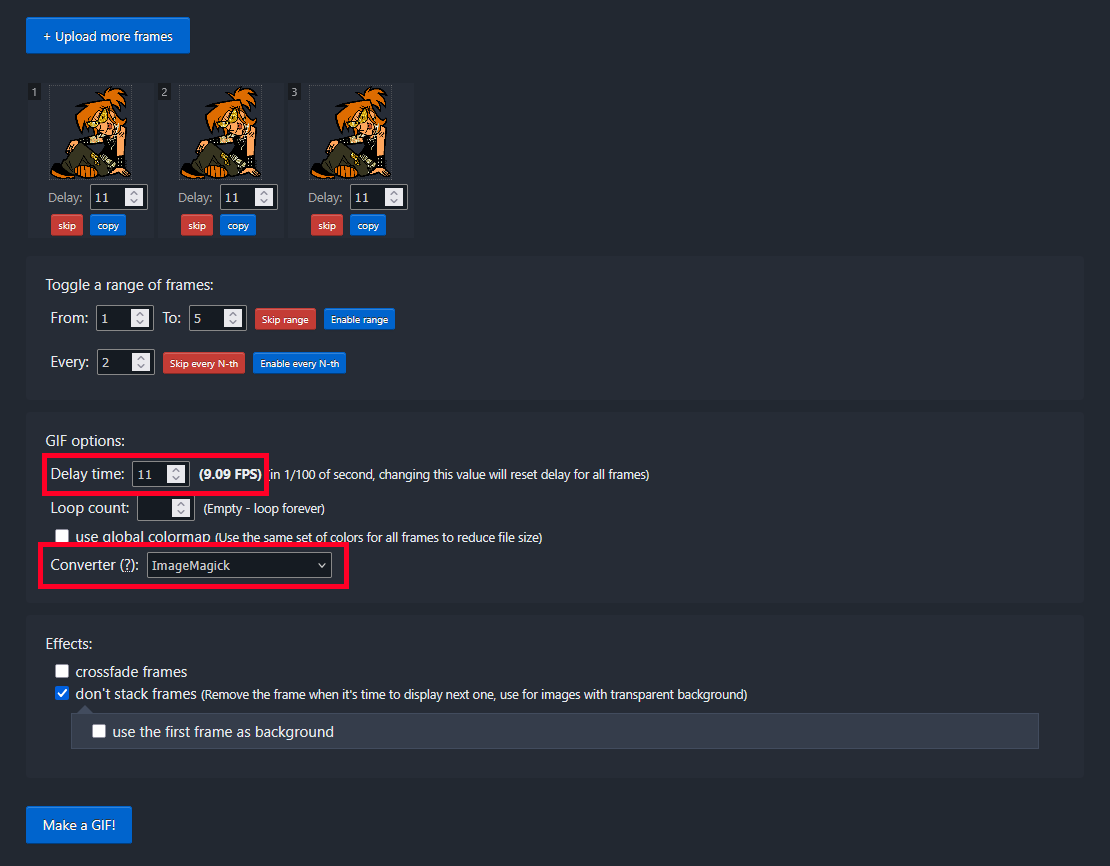
For "Delay time", I have it set to 11 so that I can get as close to 9 FPS as possible. The "Converter" I use is ImageMacgick as I have found the most success in exporting GIFs with accurate colors under this setting.
Finish
Once you export/save your .gif file, you are done and your image is ready to post! I hope this tutorial has helped you...now go bling the world. If you have any questions or concerns, please don't hesitate to let me know. Now look how shiny Zinnia turned out!
![]()
References
- How to Make Glitter Graphics on Photoshop - this 16 year old video was THE ONLY thing resembling a tutorial I could find to make glitter graphics and has helped me a lot in figuring out my workflow.